

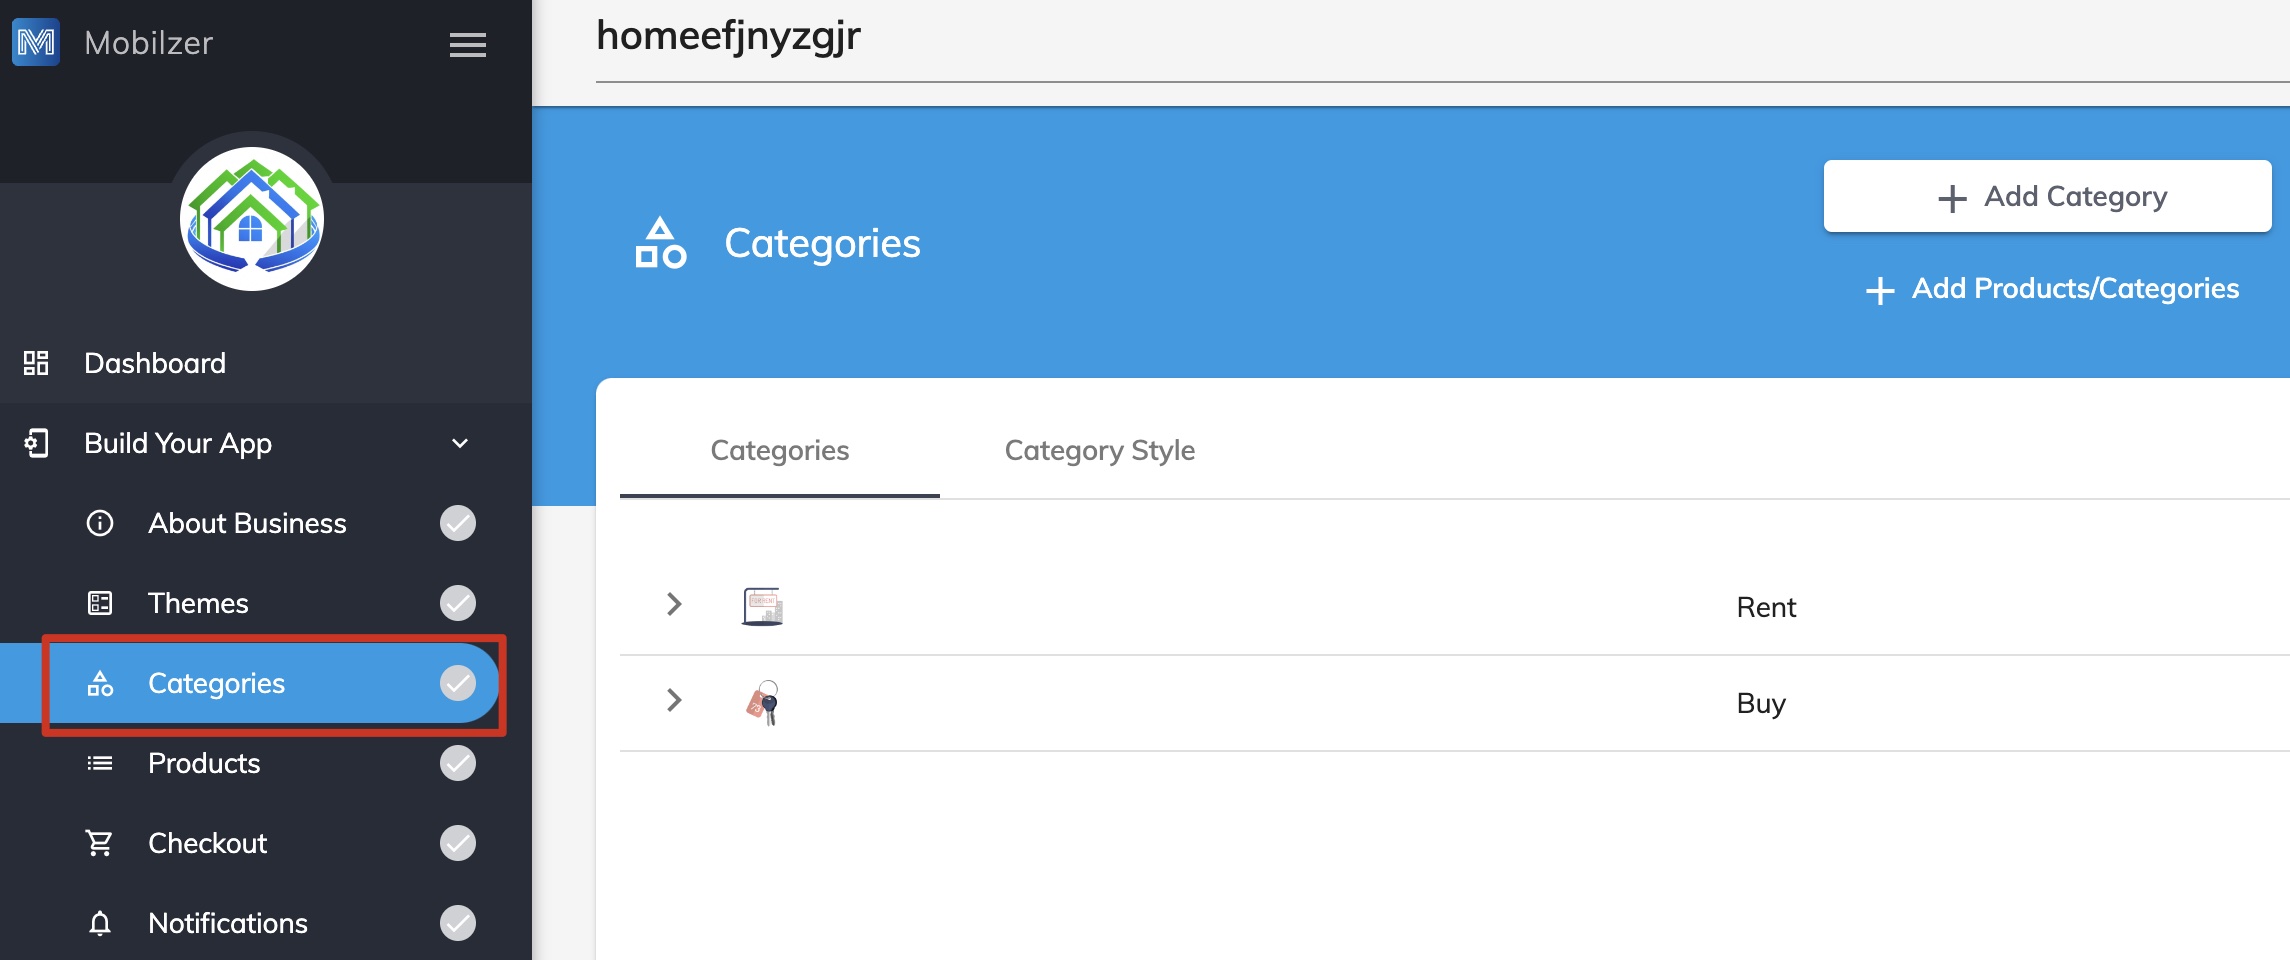
1. Accessing the Admin Dashboard
- Log In:
- Open the Mobilzer platform.
- Enter your login credentials and click “Log In.”
- Navigate to Categories:
- Click on “Build Your App” on the main dashboard.
- Select “Categories” to access the categories section.
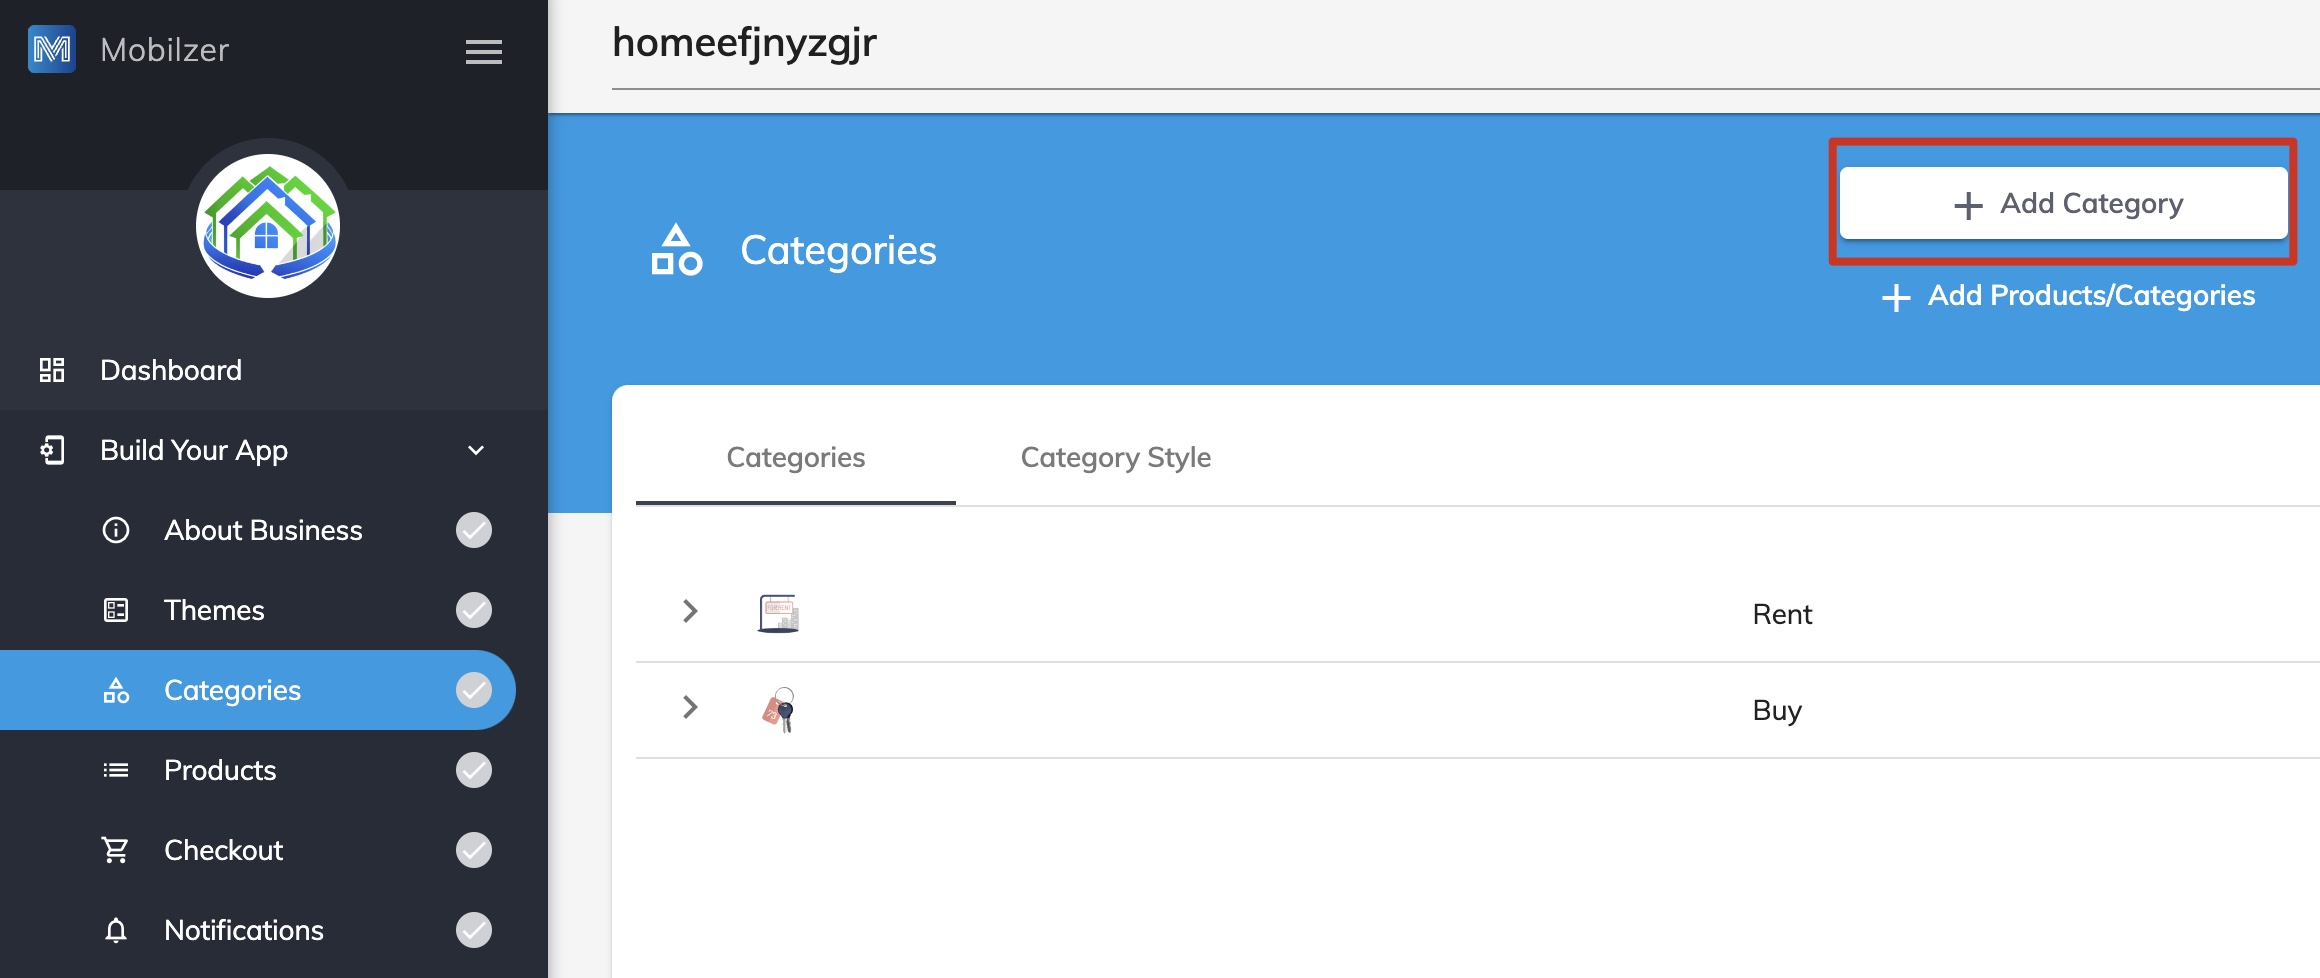
2. Adding a New Category
- Open Category Section:
- Click on the “Category” tab.
- Add New Category:
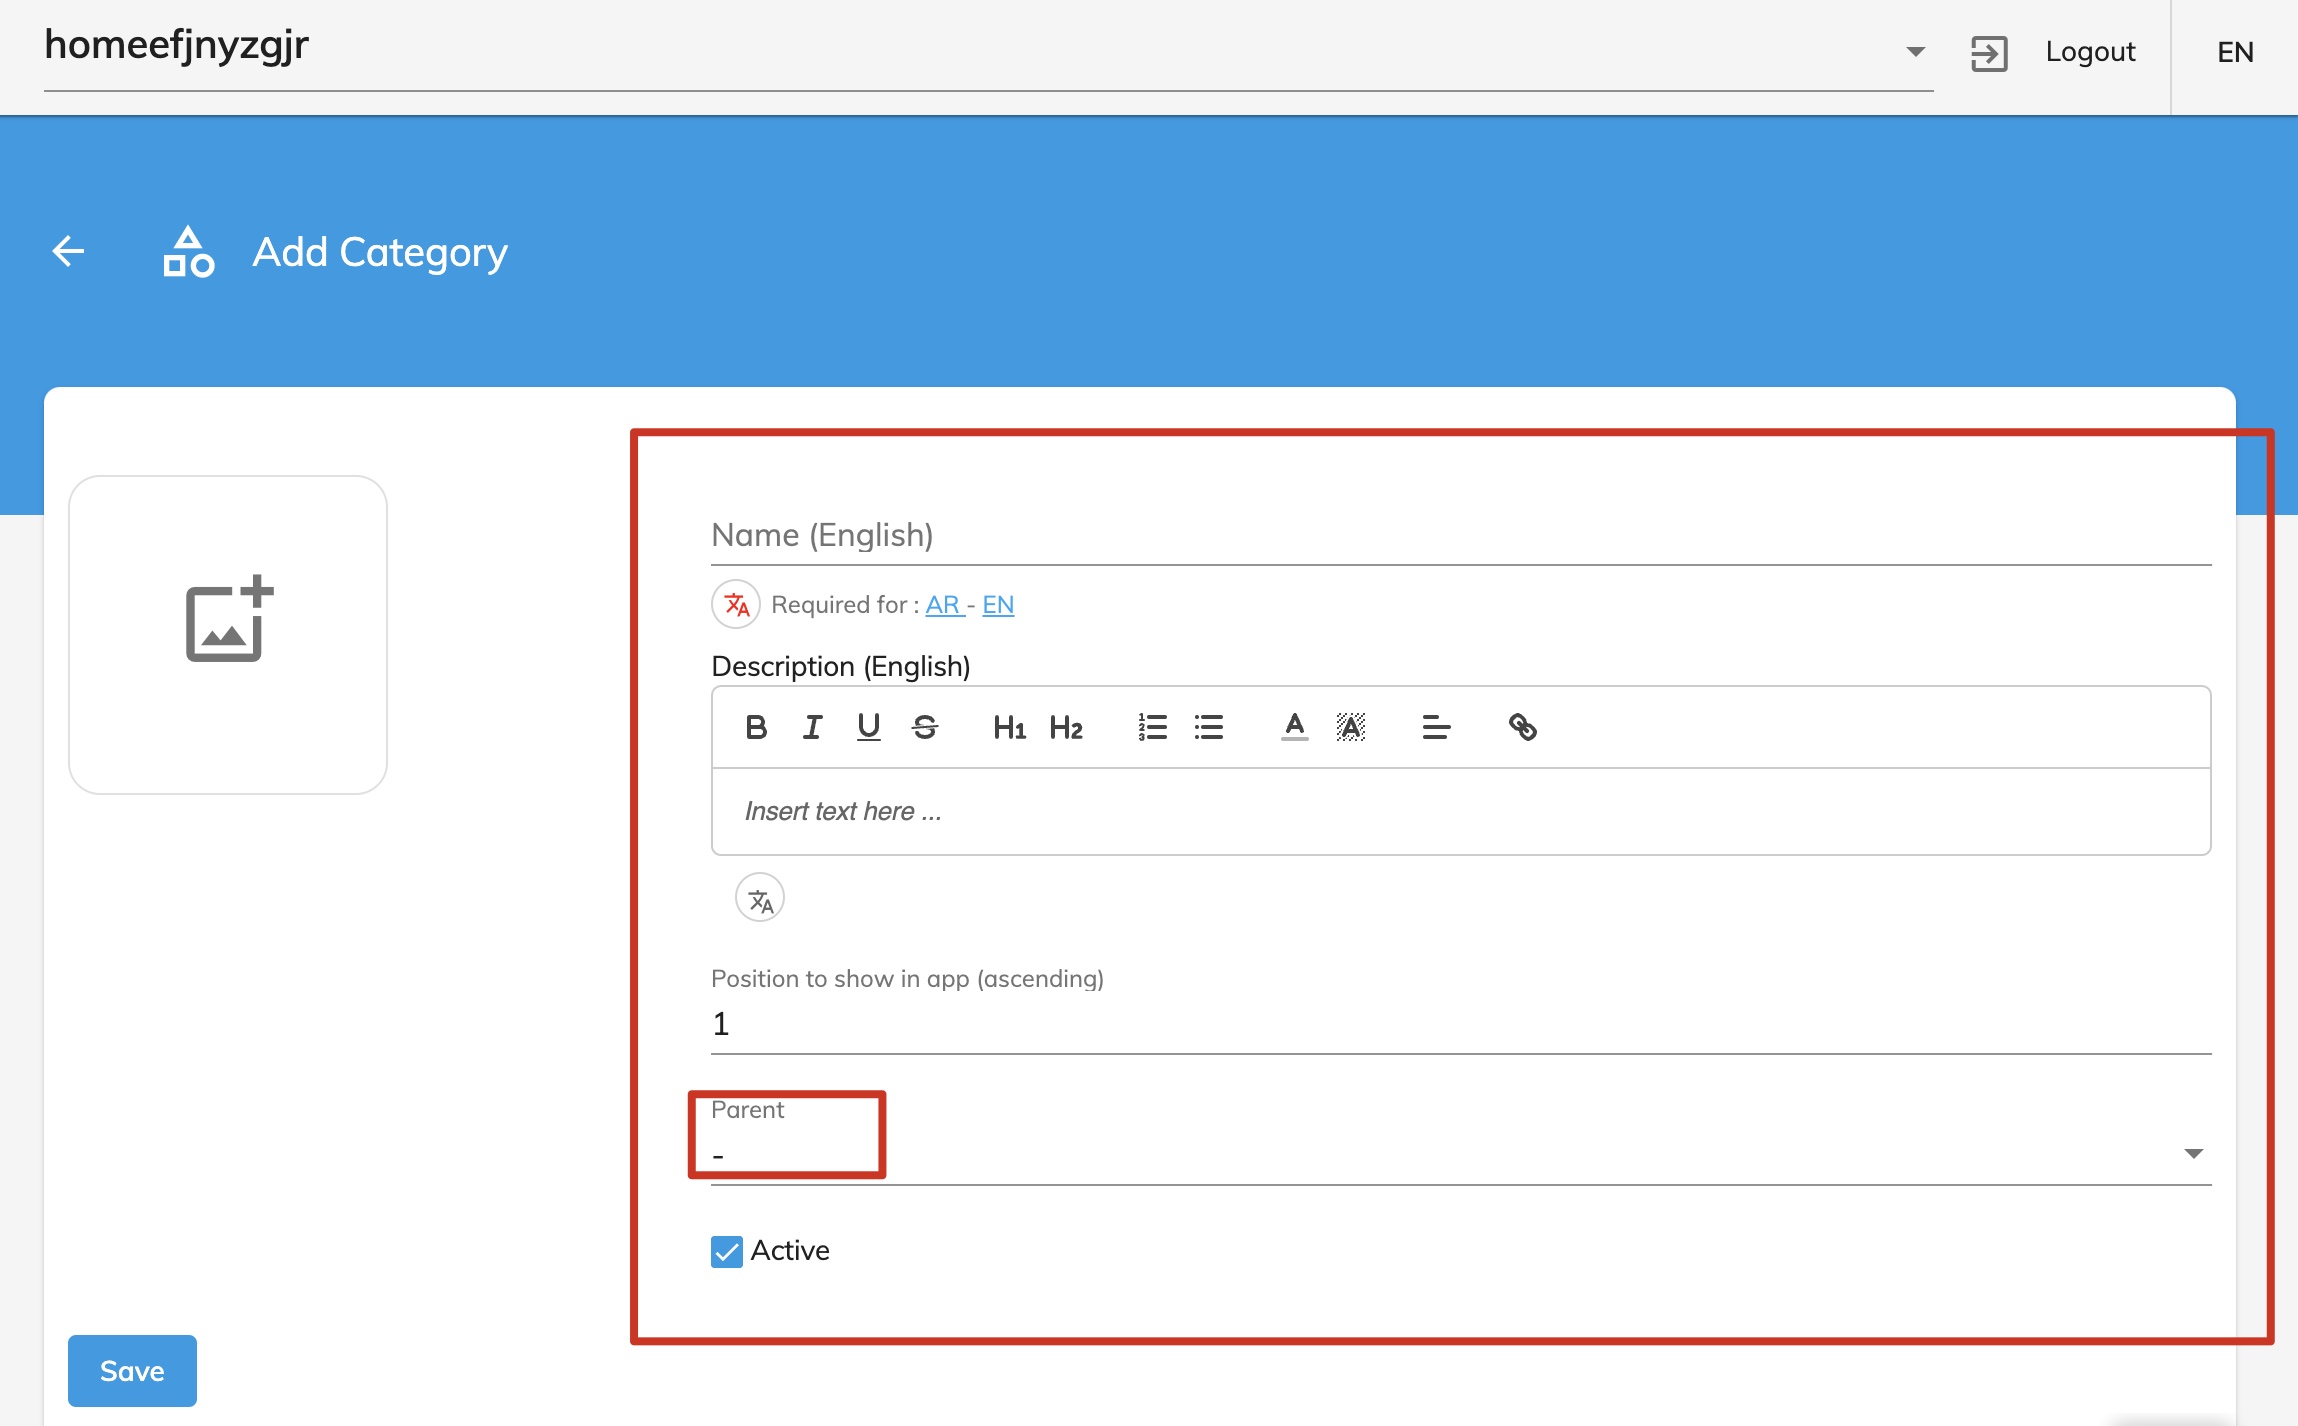
- Click the “Add Category” button.
- Enter the name for the new category in the provided field.
- Choose whether it will be a main category (no parent) or a subcategory (select a parent category).
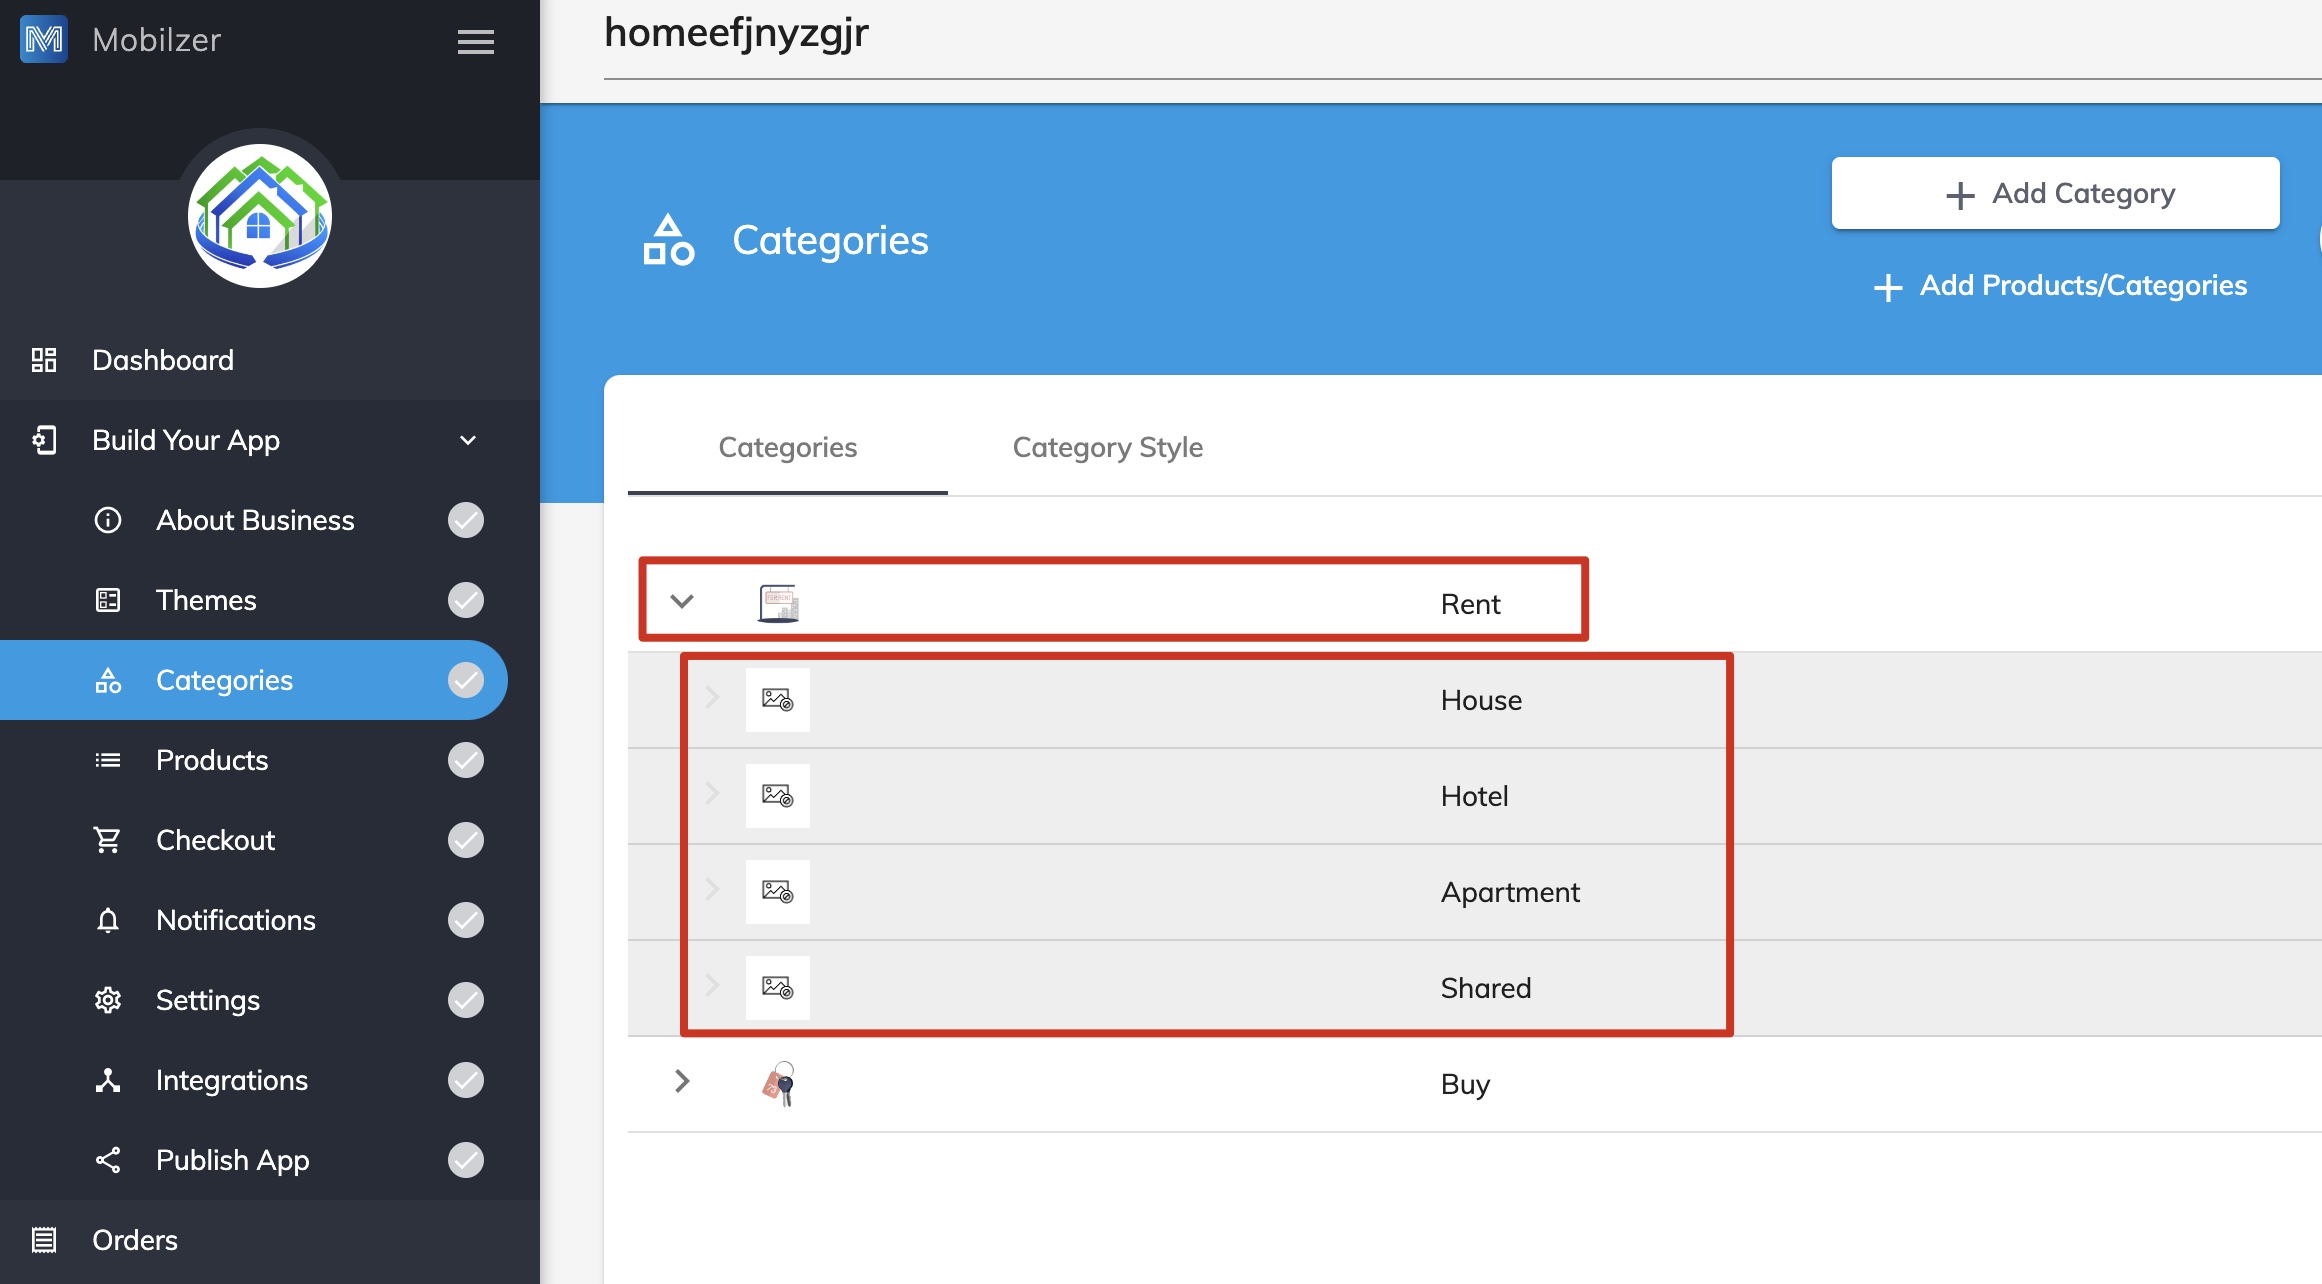
3. Managing Categories and Subcategories
- Understand Display Rules:
- Main categories (without a parent) appear on the main page.
- Subcategories (with a parent) are nested under their parent category.
- Update Categories:
- To edit, click on an existing category.
- Modify the name, parent category, or other details as needed.
- To delete, select the category and click “Delete.”
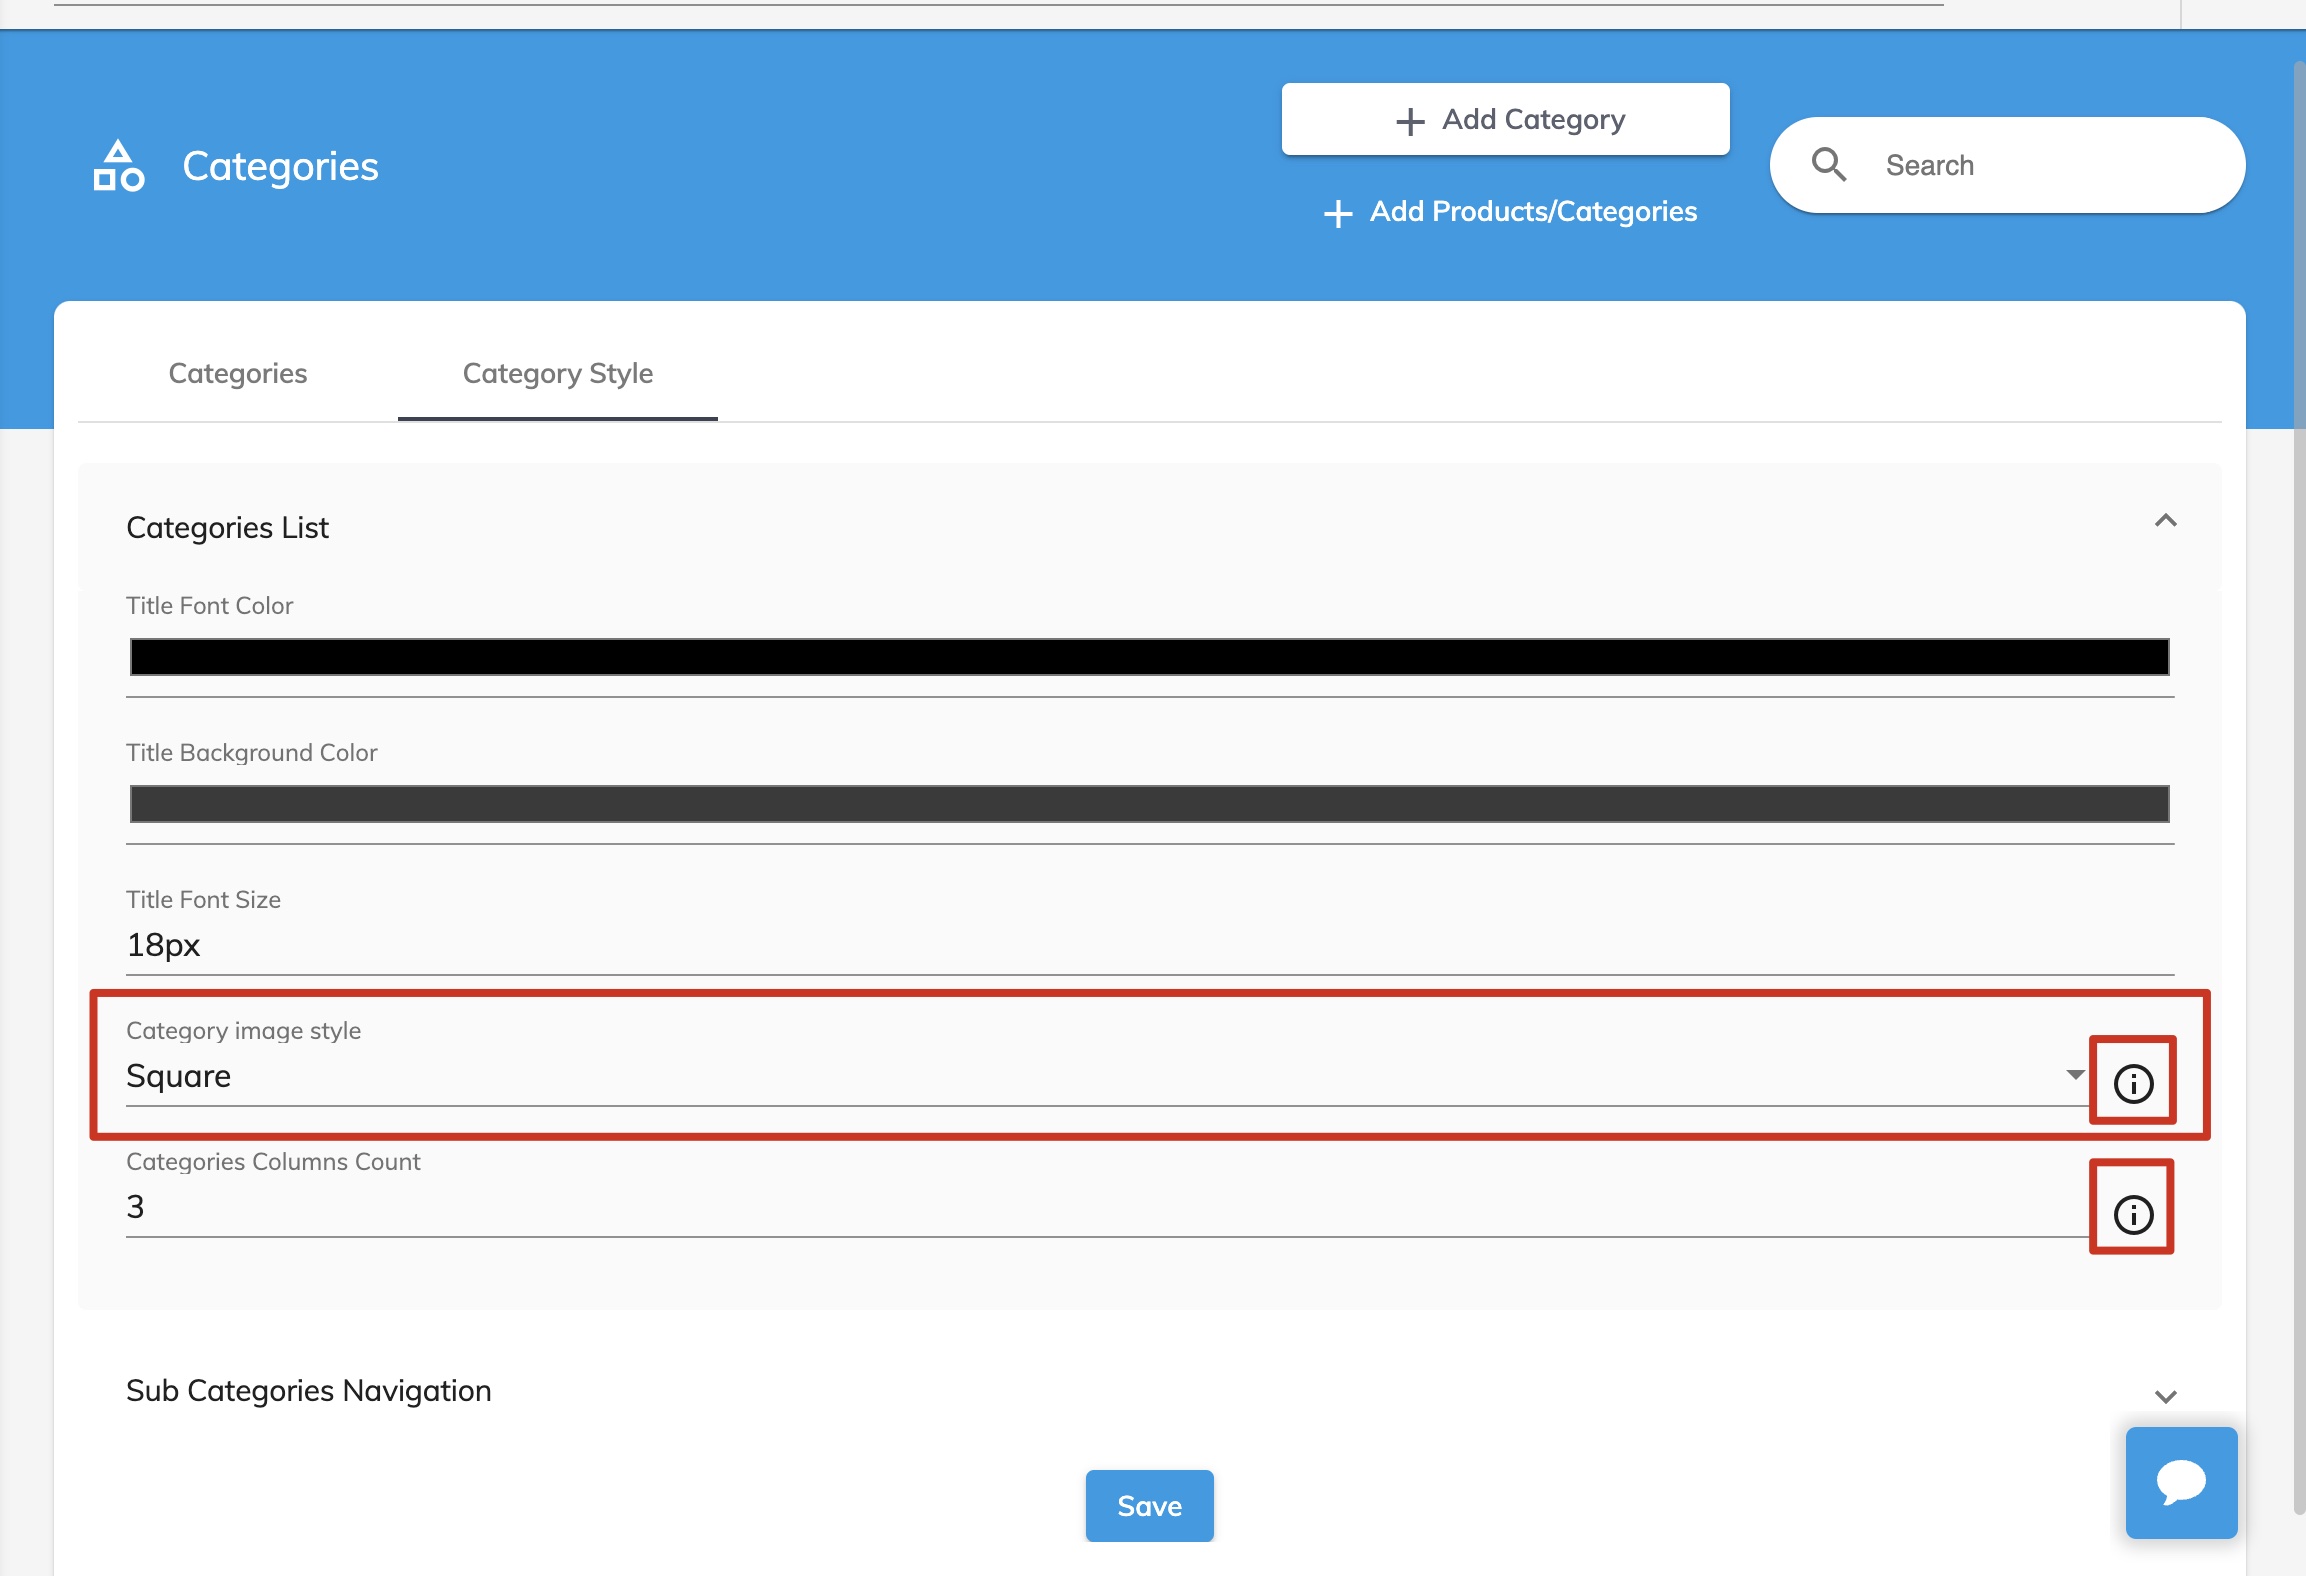
4. Customizing Category Display
- Add Visual Elements:
- Click on a category.
- Upload an image for the category by clicking on the image placeholder.
- Select Style Options:
- Choose the display style for the category: square, circle, menu, or modern.
- Adjust Layout:
- Set the column count for category display (e.g., 2 columns, 3 columns).
- Choose how subcategories are displayed: as tabs, normal, or in a menu format.
5. Saving and Refreshing Changes
- Save Changes:
- Click the “Save” button to save all changes.
- Refresh App:
- Refresh the app to see the updated category display.
Notes
- Parent Category Changes:
- Be cautious when adding or removing parent categories as it can affect the organization of subcategories.
- Clear Naming:
- Ensure category names are clear and descriptive to avoid confusion for users.
_________________________________________________________________________________________
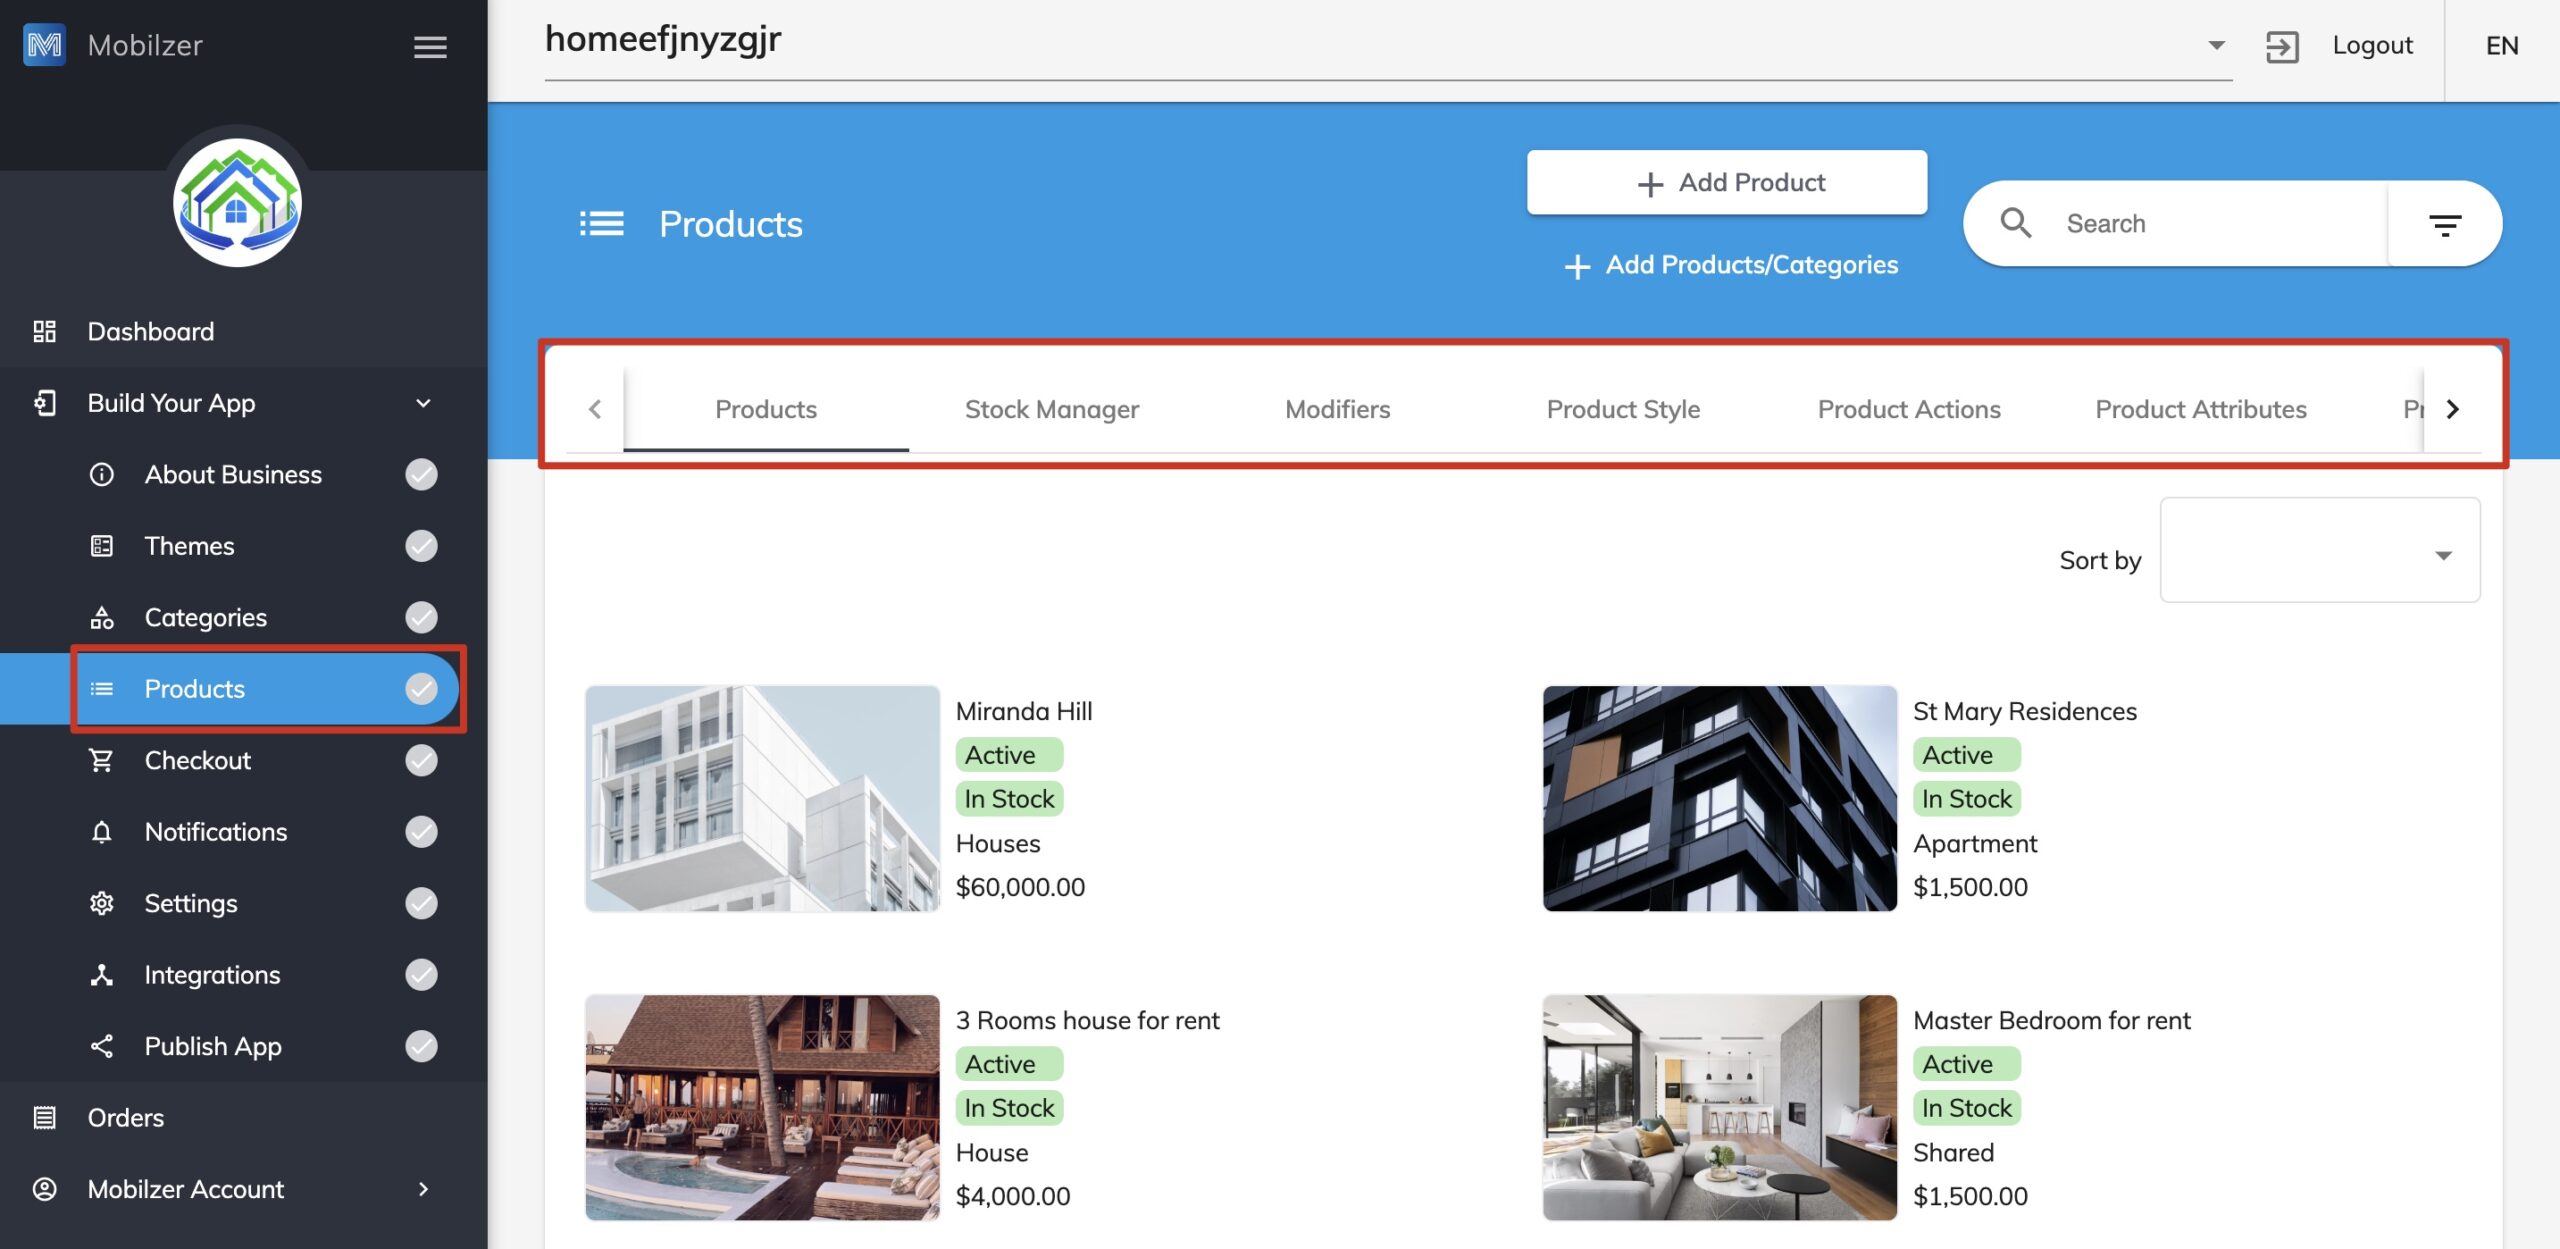
Adding a New Product
- Open Products Section:
- Click on “Products” in the app dashboard.
- Add Product:
- Click on “Add Product.”
- Enter Product Details:
- Select the main image for the product.
- Choose the product category.
- Enter the product name and description.
- Add additional details like codes, contact information, dimensions, pricing, and product images.
- Save Product:
- Click “Save” to add the new product to the app.
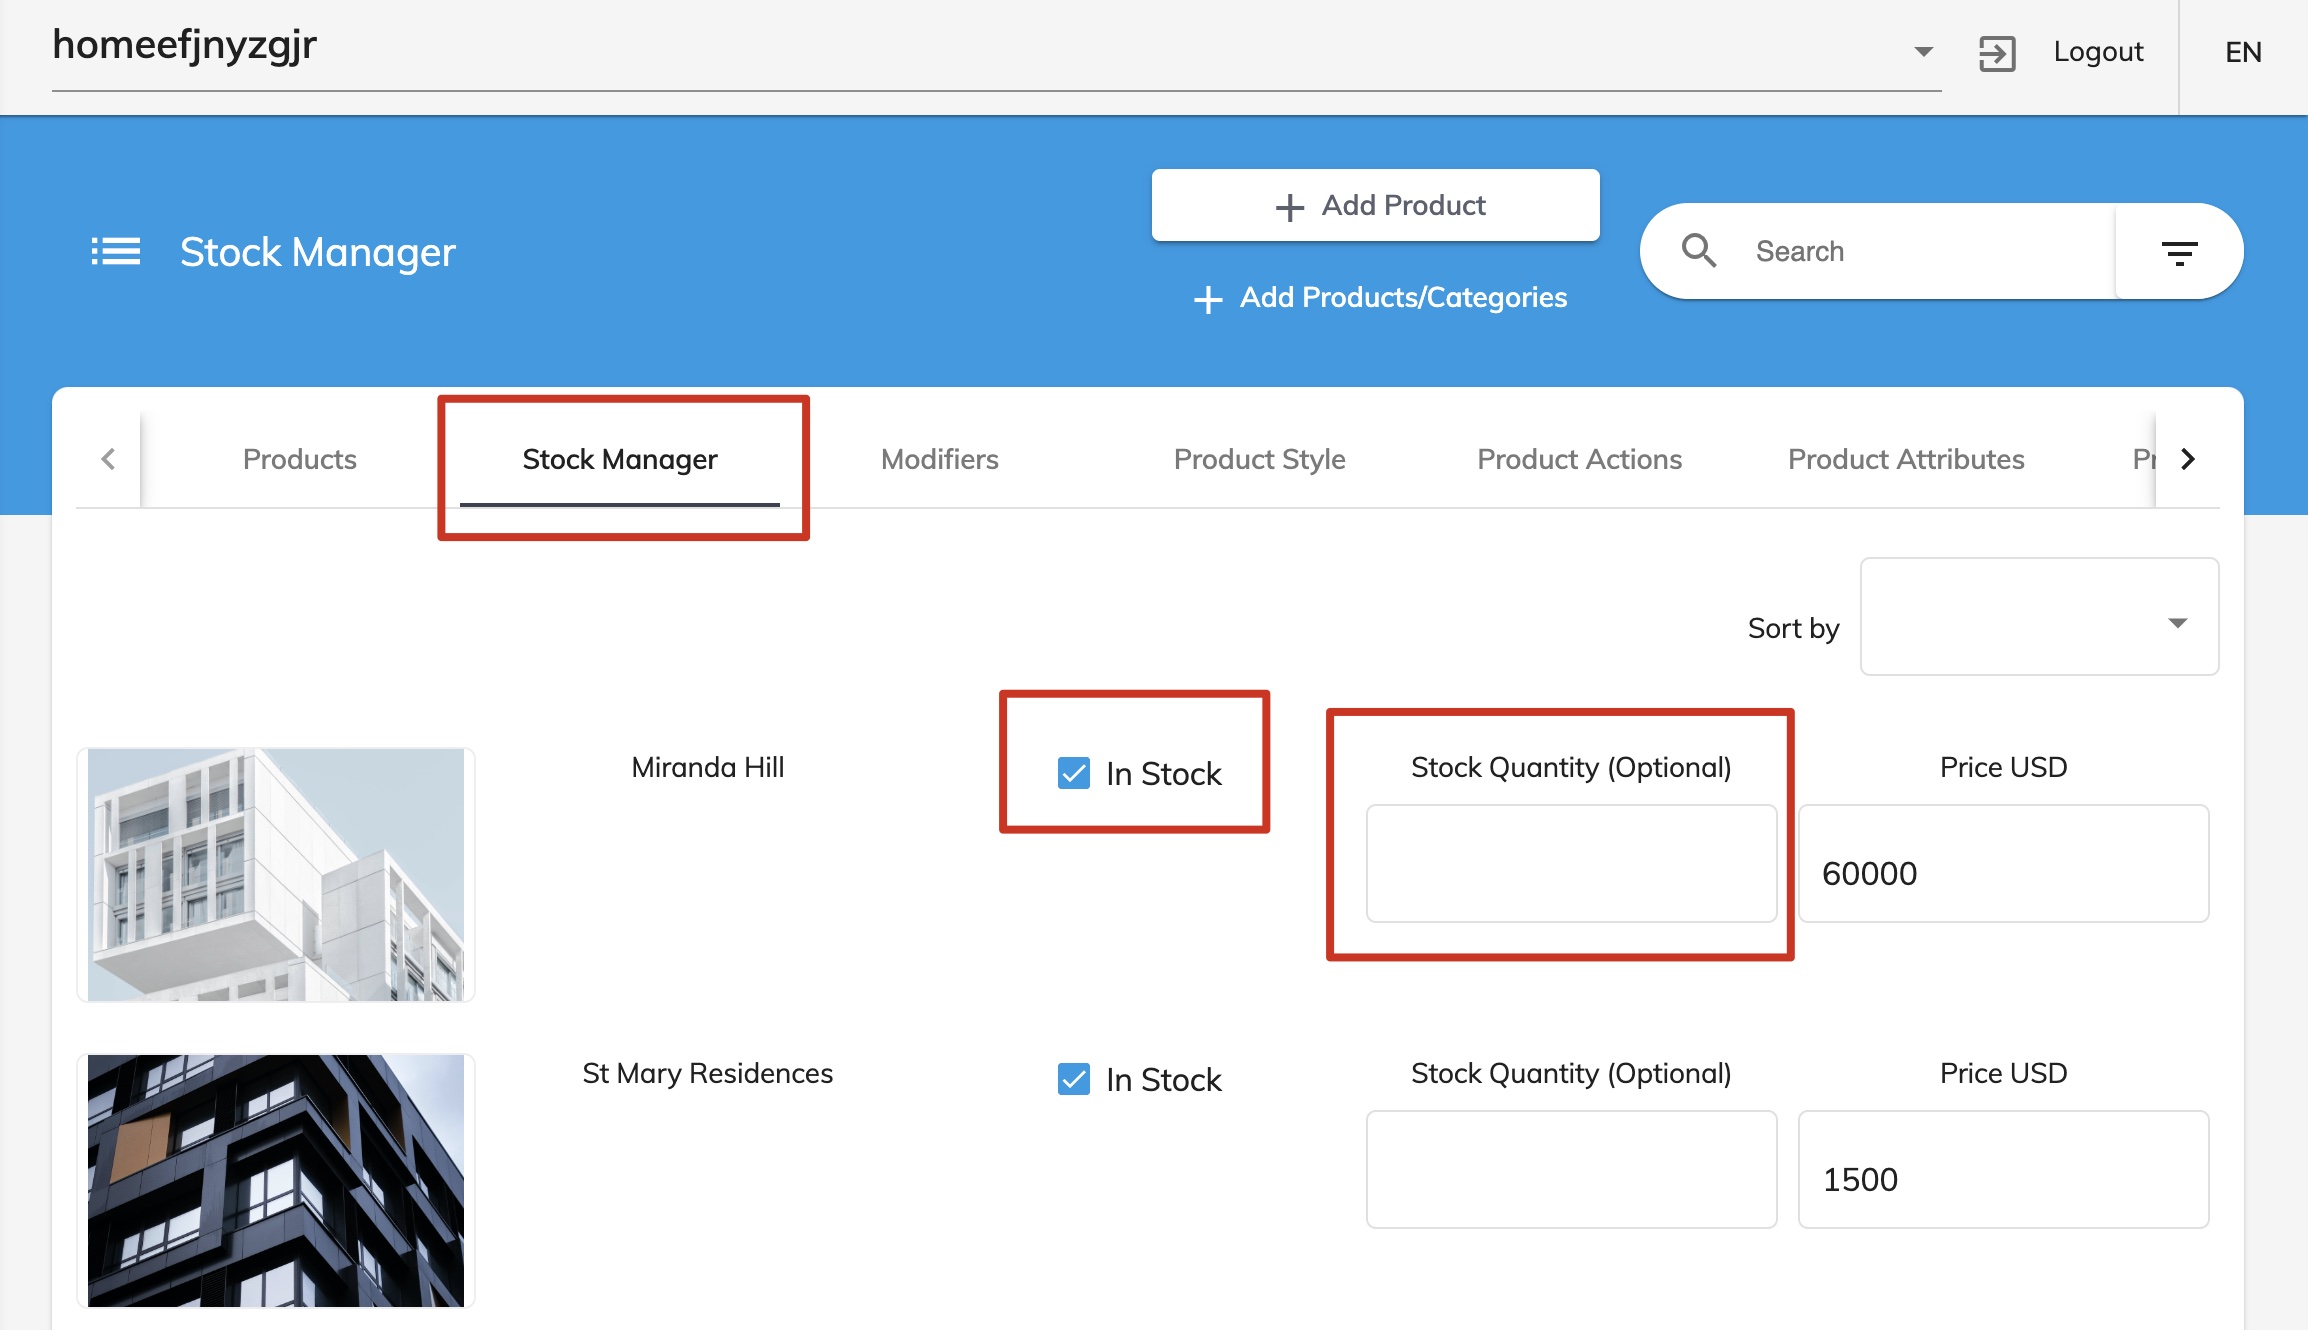
2. Managing Stock
- Access Stock Manager:
- Navigate to the stock manager in the app dashboard.
- Update Stock Information:
- Update stock availability and pricing.
- Enter stock quantity.
- Maintain Inventory:
- Deduct stock after each purchase to maintain accurate inventory levels.
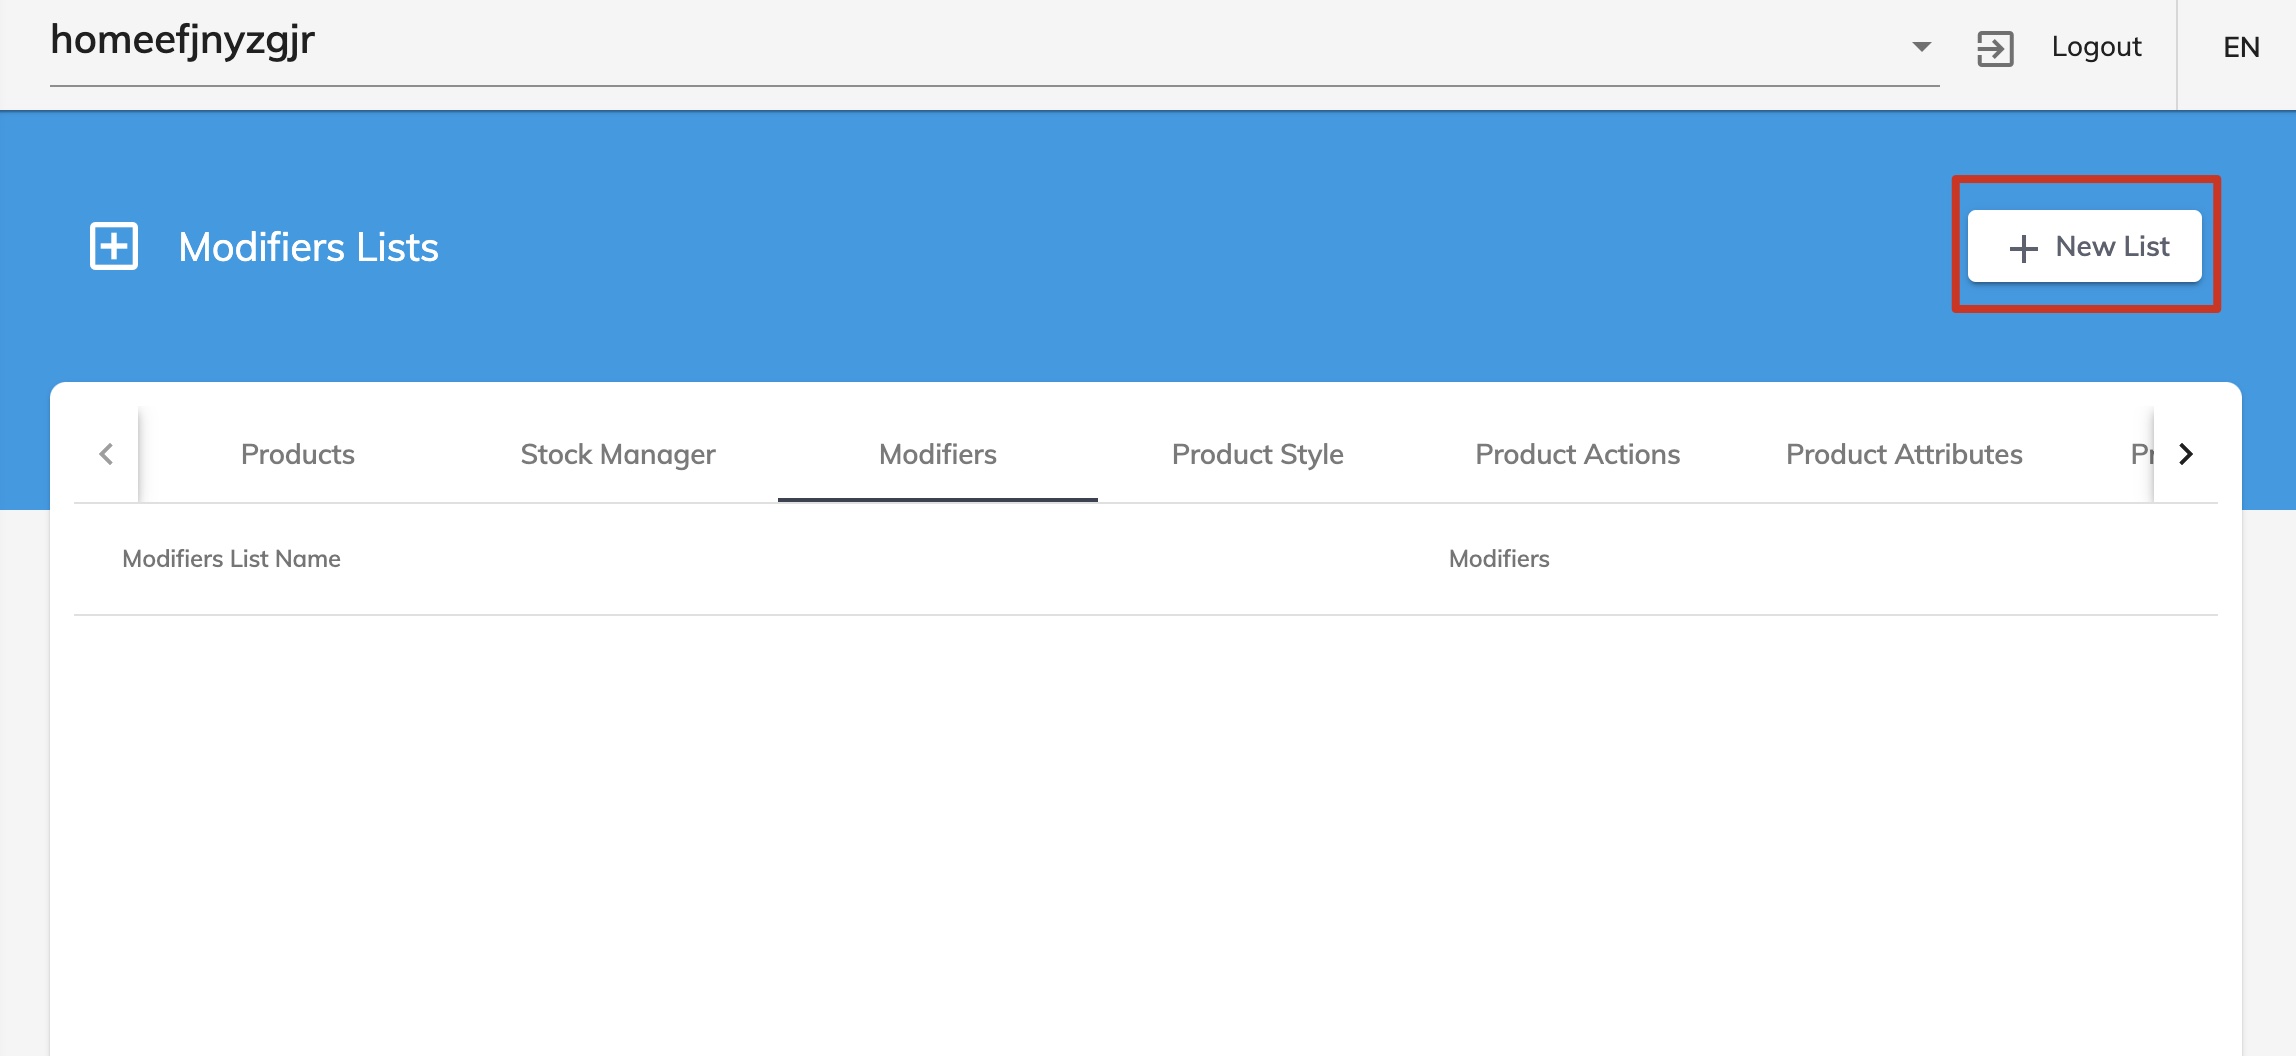
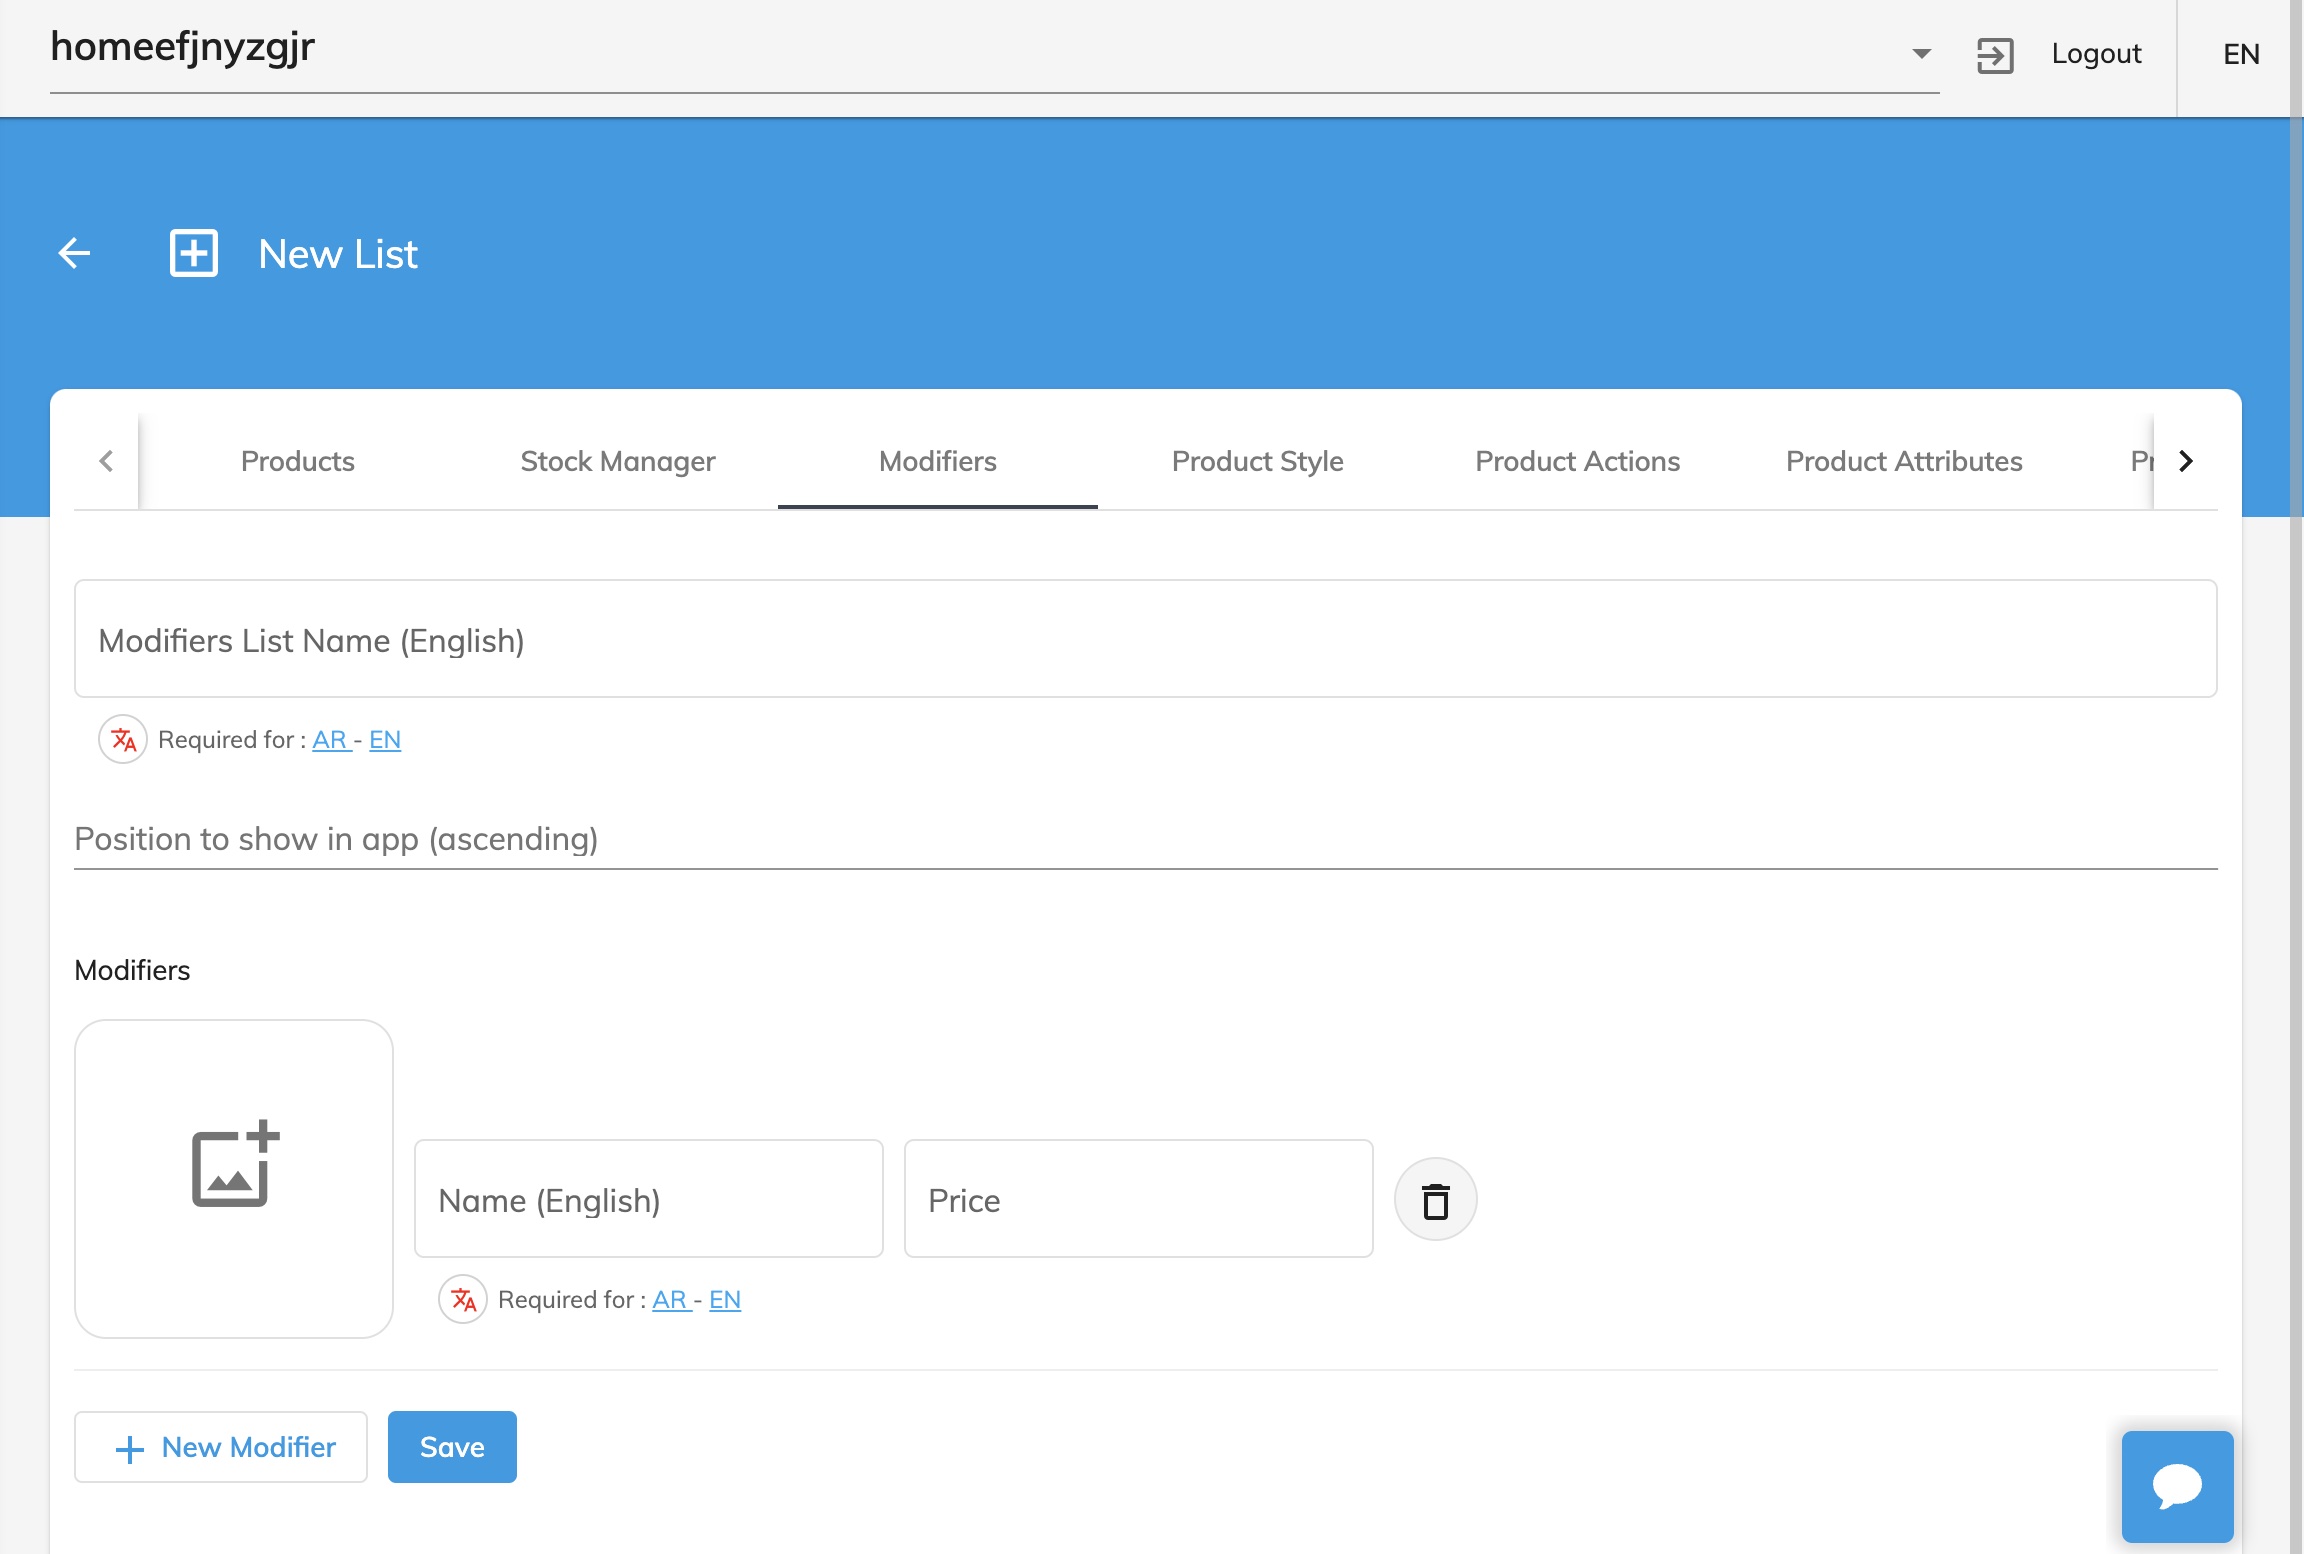
3. Utilizing Modifiers
- Define Modifiers:
- Click on the product you want to add modifiers to.
- Define customization options (e.g., adding extra toppings to a pizza).
- Enter Modifier Details:
- Specify the modifier name and price.
- Include an image if necessary.
- Save Modifiers:
- Click “Save” to apply the modifiers to the product.
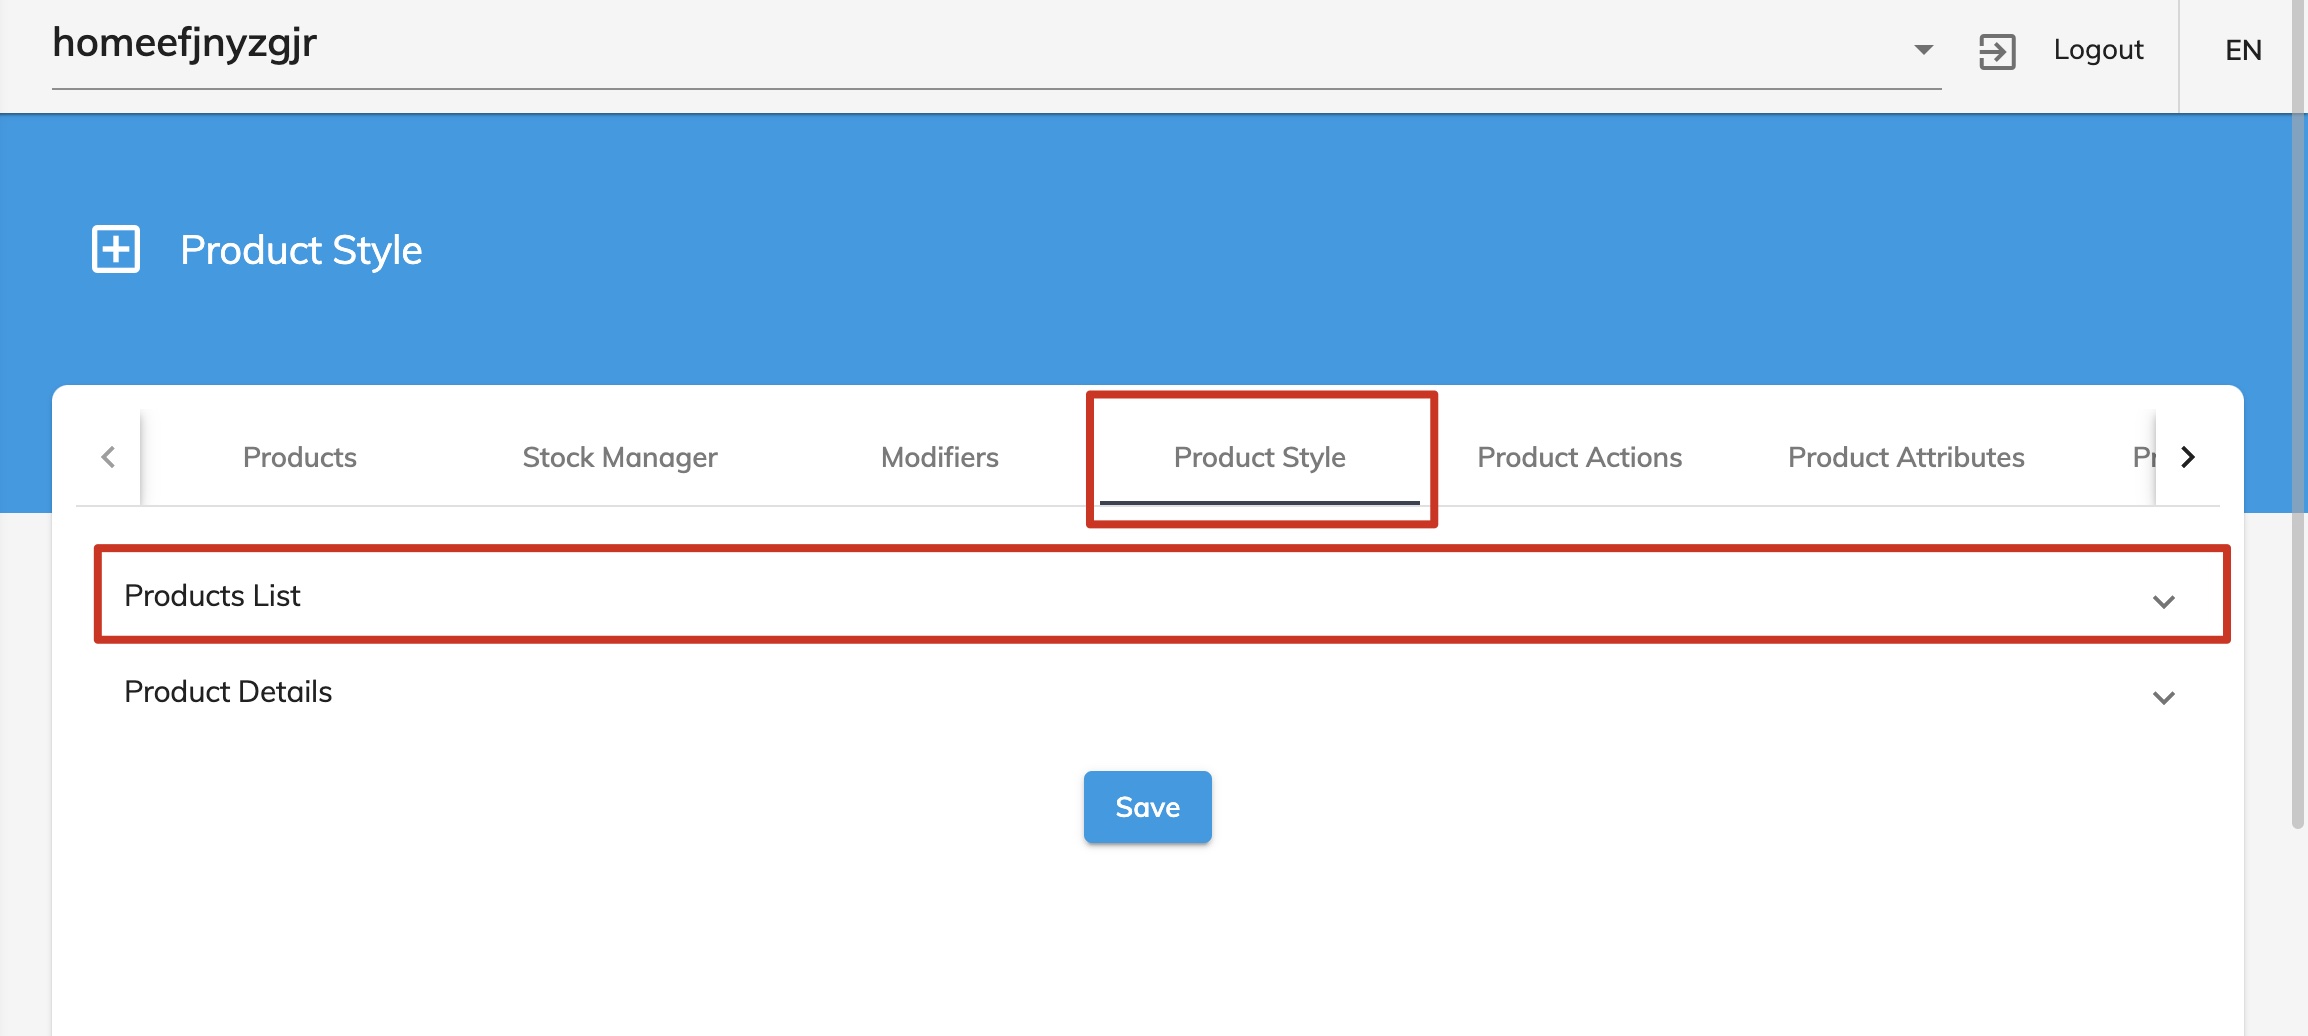
4. Customizing Product Display
- Adjust Display Options:
- Access the display settings for products.
- Adjust the header style, product image style, and product details page style.
- Choose Display Type:
- Select from various display options: image type, normal type, circle, detailed, flat, or cards.
- Save Display Settings:
- Click “Save” to apply the display settings.
5. Additional Actions
- Product Actions and Attributes:
- Enable actions like adding products to favorites or specifying product attributes.
- Customize Product Details:
- Add or remove headers as needed for each product.
Notes
- Accurate Details:
- Ensure accurate details are entered for each product to avoid confusion.
- Regular Updates:
- Regularly update stock quantities to prevent overselling.